Mushy Peas: Traditional Recipe and 5 Easy Variations
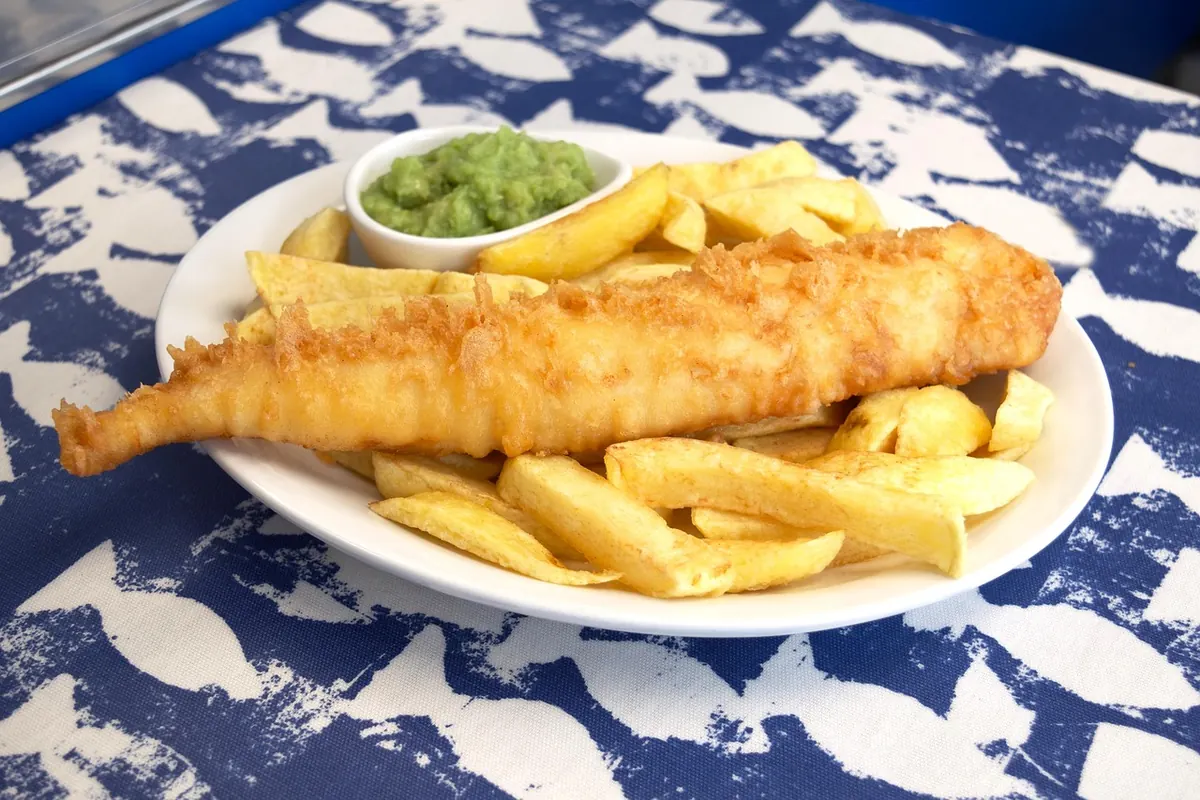
Mushy peas divide people. Some see a pale green puddle beside a fish supper and reach straight for the vinegar; others would fight you for the last spoonful. The difference is almost always in how they are made. Done badly, they are watery and bland. Done well, they are sweet, earthy and rich, with just enough texture left to feel like food rather than puree. Here is the traditional method, followed by five variations that are worth actually trying.
Start With the Right Peas
Mushy peas are not garden peas boiled to death. They are marrowfat peas: large, dried, and noticeably starchy. You will find them in the dried goods aisle, usually in 500g bags, sometimes labelled "processed peas" or sitting next to the pearl barley. Tinned marrowfat peas exist too, and they are a perfectly respectable shortcut when you want peas on the plate in ten minutes.
Two things matter more than anything else. First, the soak. Dried marrowfat peas need a long one, ideally overnight, and they need bicarbonate of soda in the water. That is what gives them their soft, collapsing texture and the faintly savoury note that plain boiling never quite delivers. Second, the age of the peas. Old packets take far longer to soften and sometimes never get there. Buy from a shop with decent turnover and use them within a year.
The Classic Recipe
Ingredients
- 250g dried marrowfat peas
- 1 tsp bicarbonate of soda
- About 750ml cold water, plus more for cooking
- 25g butter, or a generous knob
- Salt and white pepper
That makes enough for four to six people as a side. It scales easily, but use a bigger pan than you think you need, because the peas swell.
Method
- Soak overnight. Tip the peas into a large bowl, add the bicarbonate of soda and plenty of cold water, and leave for at least 12 hours. They will roughly double in size. If you have forgotten until the morning, pour boiling water over them with the bicarb and leave for two hours, though the results are a little less even.
- Drain and rinse. Give them a good rinse under the tap. This removes the last of the bicarb and stops the finished peas tasting soapy.
- Simmer gently. Put the peas in a pan and cover with fresh cold water by about 3cm. Bring to a boil, then drop to a low simmer. Skim off any grey foam that rises. Cook for 45 to 60 minutes, stirring now and then so nothing sticks.
- Check the collapse. The peas are ready when they crush easily against the side of the pan with a wooden spoon. If they are still firm, keep going in ten-minute bursts. Add hot water if the pan looks dry.
- Mash and enrich. Drain off some of the cooking liquid, keeping a mugful back, then mash roughly with the butter. You want a thick, spoonable consistency, not a smooth paste, so leave some whole peas in there. Loosen with the reserved liquid if needed.
- Season late. Add salt and plenty of white pepper at the end. Salting heavily at the start can keep the skins tough.
Texture, Timing and Troubleshooting
Mushy peas are forgiving, but a few things go wrong regularly. If the peas are still hard after an hour, they are probably old; add a pinch more bicarbonate of soda and keep simmering, and accept that they may stay slightly firm. If they are watery, drain them rather than boiling them down, then mash with butter, which thickens as much as it flavours. If they taste bitter or soapy, you either skimped on the rinse or used too much bicarb.
On consistency, the north of England tends to like them thick enough to hold a ridge from the spoon; chip shops in other regions serve them looser, almost pourable. Both are correct. Adjust with cooking liquid, and remember they thicken as they cool, so take them off the heat slightly wetter than you want them.
Five Easy Variations
All five start with the finished classic recipe. Stir the additions through at the end, off the heat, so the flavours stay bright.
1. Mint
The most traditional of the lot. Stir in two tablespoons of finely chopped fresh mint, or a teaspoon of mint sauce if you want that sharper, vinegary edge you get from a proper chip shop. A squeeze of lemon lifts it further. Taste before you add salt, since mint sauce brings its own.
2. Curry
Soften half a finely chopped onion in the butter first, add a teaspoon of mild curry powder or garam masala, and let it sizzle for thirty seconds before stirring it into the peas. A spoonful of yoghurt at the end makes them creamier. Keep the spice gentle; this is a side dish, not a curry.
3. Garlic
Roast four unpeeled garlic cloves alongside whatever else is in the oven, squeeze out the soft middles and mash them into the peas with the butter. Roasting keeps it sweet rather than aggressive. If you are short of time, a crushed clove cooked gently in the butter for a minute will do the job.
4. Chilli and Lemon
Warm a chopped red chilli and a pinch of chilli flakes in the butter, then stir through with the zest of half a lemon. This is the version to serve with fried fish that has a heavy, crisp batter, because the acid cuts straight through it.
5. Creamy Chip Shop Style
Swap the butter for a tablespoon of butter plus two tablespoons of double cream, and mash harder than usual until nearly smooth. A little white pepper and a splash of the cooking liquid gets you that pale, glossy texture from behind the counter. It is rich, and it is the point.
What to Serve With Them
Mushy peas belong with battered fish, obviously, but they earn their place elsewhere too. A bowl alongside a pork pie, a plate of pie and chips, or a roast ham is a proper northern Sunday. They also work as a vegetarian main if you loosen them into a soup and top with a swirl of butter and some crusty bread. Leftovers are excellent spread on toast with a fried egg on top, which is nobody's tradition but everyone's good idea.
Make a Batch, Freeze the Rest
This recipe makes more than most households get through in one sitting, which is fine. Mushy peas freeze well: cool them quickly, portion into tubs, and keep for up to three months. Reheat gently in a pan with a splash of water, stirring so they do not catch. They will not be quite as good as the day they were made, so add a fresh knob of butter when they come back to life. If you are starting from tinned peas, drain two 400g tins, warm them with a little water and butter, mash lightly, and season. Ten minutes, and a very decent plate.
Photo: Timbigger / Pixabay